
Dronelost.com – DroneDeploy is one of the most popular and powerful mapping platforms for drone users. It allows you to plan, fly, and process aerial imagery and data with ease and accuracy. But what if you have an Autel drone, such as the EVO 2 or the X-Star Premium?
Can you use DroneDeploy with Autel drones? The answer is yes, you can use DroneDeploy with Autel drones, but not directly. Unlike some other drone brands, such as DJI or Parrot, Autel drones are not fully integrated with DroneDeploy.
This means that you cannot use the DroneDeploy app to control your Autel drone and capture images. However, you can still use the Autel Explorer app to fly your drone and take photos, and then upload them to the DroneDeploy web app for processing and analysis.
By the end of this blog post, you will have a clear understanding of how to use DroneDeploy with Autel drones and how to get the most out of your aerial mapping projects.
Why use DroneDeploy for mapping and data analysis?
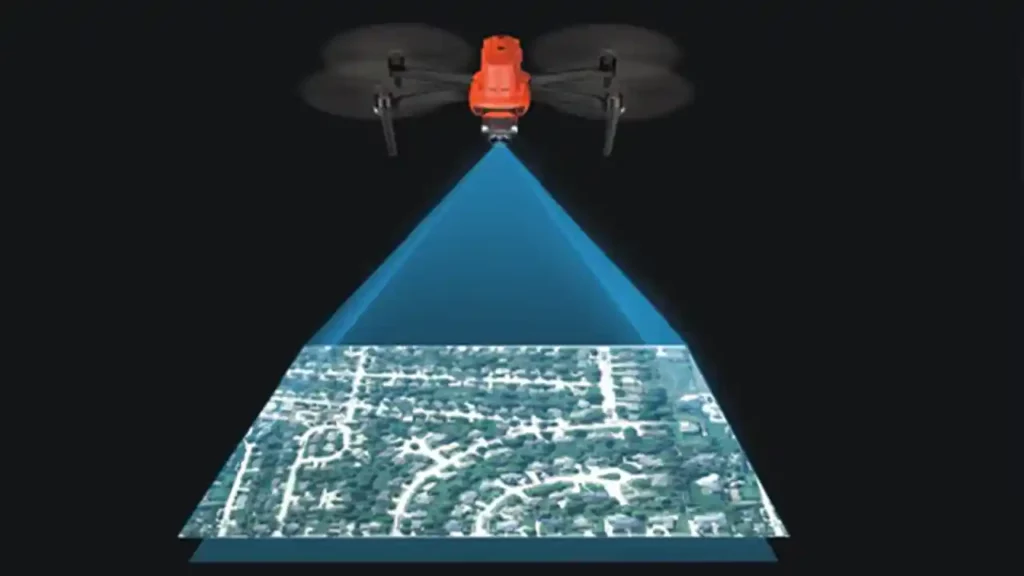
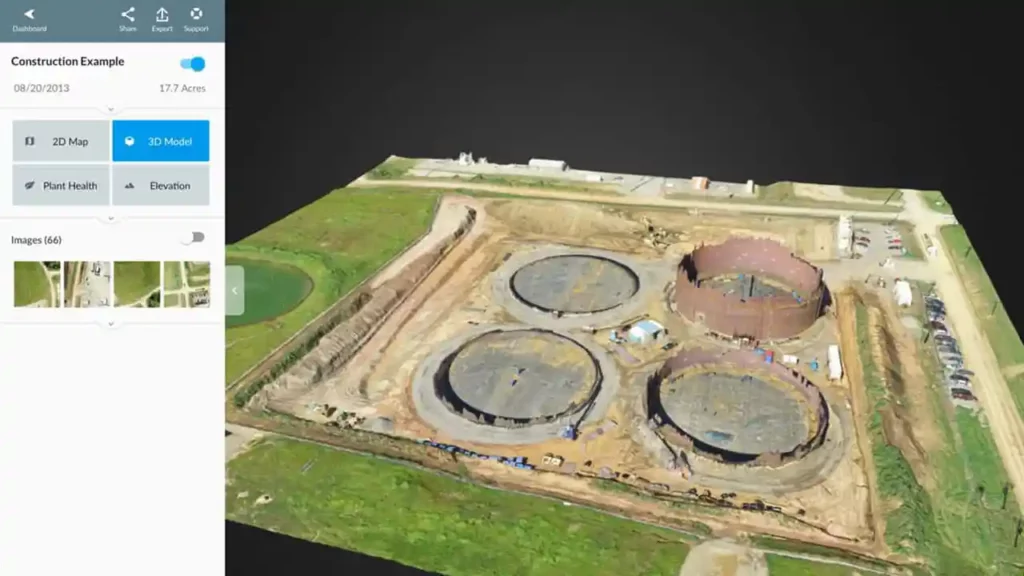
DroneDeploy is a cloud-based platform that enables you to create high-quality maps and 3D models from drone imagery. It also provides you with a suite of tools to analyze and visualize your data, such as measuring distances, areas, volumes, elevations, and more. You can also generate reports and export your data to various formats and integrations.
DroneDeploy is designed to work with a wide range of drones, cameras, and sensors, including DJI, Parrot, Yuneec, Skydio, and more. It supports both RGB and multispectral imagery, as well as thermal and LiDAR data. You can use DroneDeploy for various applications, such as agriculture, construction, inspection, surveying, mining, and more.
DroneDeploy has a user-friendly interface that makes it easy to plan, fly, and process your drone missions. You can use the DroneDeploy Flight app to create a flight path and control your drone autonomously. You can also use the DroneDeploy web app to upload and process your images in the cloud, and access your maps and data from any device.
DroneDeploy offers different plans and pricing options to suit your needs and budget. You can start with a free trial and upgrade to a paid plan later. You can also customize your plan with add-ons and integrations, such as Live Map, Stand Count, Roof Report, and more.
Which Autel drones are compatible with DroneDeploy
Unfortunately, the DroneDeploy Flight app is not compatible with any Autel drone as of the writing of this blog post. This means that you cannot use DroneDeploy to plan and fly your Autel drone missions.
However, this does not mean that you cannot use DroneDeploy with Autel drones at all. You can still use DroneDeploy to process and analyze the images captured by your Autel drone, as long as they meet the data processing requirements.
DroneDeploy has stated that they plan to add support for Autel drones in the future, but they have not given a specific timeline or roadmap for this. Therefore, if you have an Autel drone and you want to use DroneDeploy, you will have to use a workaround method, which we will explain in the next section.
The Autel drones that can capture images suitable for DroneDeploy processing are the following:
- Autel EVO 2: This is a foldable drone that features a 1/2″ CMOS sensor and a 48MP camera. It can capture 4K video at 60fps and 8K video at 25fps. It has a flight time of up to 40 minutes and a range of up to 9 km. It also has obstacle avoidance and intelligent flight modes. The EVO 2 comes in three variants: the EVO 2, the EVO 2 Pro, and the EVO 2 Dual. The EVO 2 Pro has a 1″ CMOS sensor and a 20MP camera with an adjustable aperture. The EVO 2 Dual has a dual-sensor system that combines an 8K RGB camera and a 640×512 thermal camera.
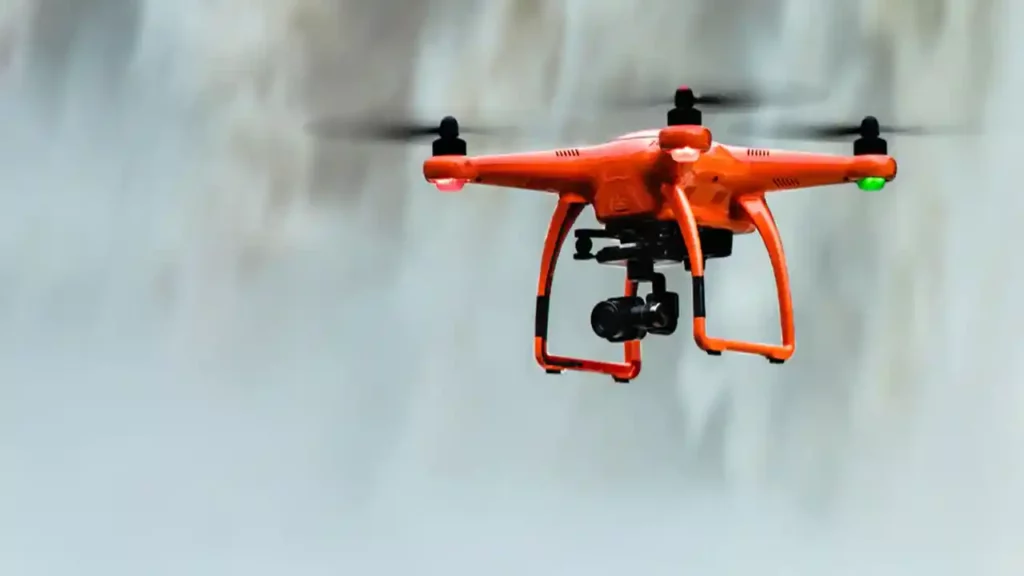
- Autel X-Star Premium: This is a quadcopter drone that features a 1/2.3″ CMOS sensor and a 12MP camera. It can capture 4K video at 30fps and 1080p video at 120fps. It has a flight time of up to 25 minutes and a range of up to 2 km. It also has a 3-axis gimbal and a detachable camera. The X-Star Premium comes with a 64GB microSD card and a hard case.
These are the two main Autel drones that can be used with DroneDeploy, but you may also be able to use other Autel drones that have similar specifications and capabilities. However, you should always check the data processing requirements and guidelines before uploading your images to DroneDeploy.
How to create a flight path and capture images with the Autel Explorer app
Since the DroneDeploy Flight app is not compatible with Autel drones, you will have to use the Autel Explorer app to create a flight path and capture images for your mapping project.
The Autel Explorer app is the official app for Autel drones, and it allows you to control your drone, adjust the camera settings, and access various flight modes and features. To use the Autel Explorer app with DroneDeploy, you will need to follow these steps:
- Download and install the Autel Explorer app on your mobile device. You can find it on the Google Play Store or the App Store.
- Connect your Autel drone to your mobile device via the remote controller. Make sure your drone and remote controller are fully charged and updated to the latest firmware version.
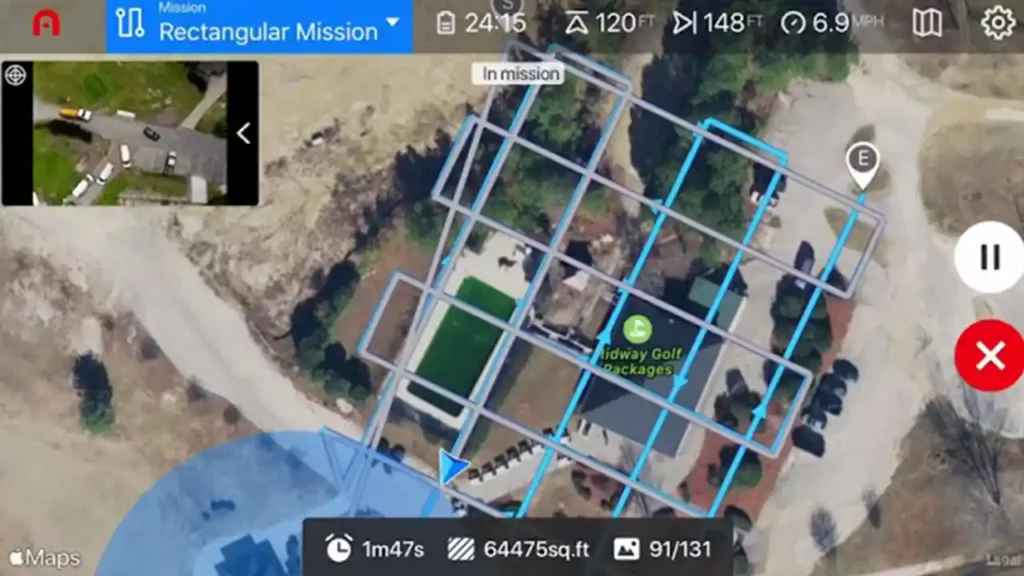
- Launch the Autel Explorer app and tap on the Flight Plan icon on the top right corner of the screen. This will open the flight plan menu, where you can choose from different flight modes, such as Waypoint, Orbit, Follow Me, and more.
- Select the Waypoint mode, which allows you to create a custom flight path and set waypoints for your drone. You can also adjust the altitude, speed, heading, and actions for each waypoint.
- Tap on the Map icon on the bottom left corner of the screen to switch to the map view. You can use the map to plan your flight path and set your waypoints. You can also use the satellite or hybrid view to see the terrain and features of your mapping area.
- To set a waypoint, tap on the map and drag the waypoint marker to the desired location. You can also pinch to zoom in or out, and rotate the map to change the orientation. You can set up to 99 waypoints for your flight plan.
- To edit a waypoint, tap on the waypoint marker and use the slider to adjust the altitude, speed, heading, and actions. You can also tap on the Delete icon to remove the waypoint. You can also use the Auto mode to let the app automatically set the optimal altitude and speed for your waypoints.
- To save your flight plan, tap on the Save icon on the top right corner of the screen. You can name your flight plan and access it later from the Saved Plans menu.
- To start your flight, tap on the Start icon on the bottom right corner of the screen. You will see a confirmation message and a countdown timer. You can also tap on the Pause icon to pause your flight, or the Stop icon to end your flight.
- To capture images for your mapping project, you will need to set the camera settings and the interval mode. You can do this before or during your flight, by tapping on the Camera icon on the bottom right corner of the screen. You can adjust the exposure, ISO, shutter speed, white balance, and more. You can also switch between photo and video mode, and between single and burst mode.
- To enable the interval mode, tap on the Interval icon on the top right corner of the screen. This will allow you to set the time interval for capturing images automatically. You can choose from 2, 3, 5, 7, or 10 seconds. You can also turn off the interval mode by tapping on the icon again.
- To view the images you have captured, tap on the Gallery icon on the top left corner of the screen. You can also download the images to your mobile device, or delete the images you don’t need.
These are the basic steps to create a flight path and capture images with the Autel Explorer app. You can also use other features and settings of the app to customize your flight experience.
How to upload and process images with the DroneDeploy photogrammetry software
After you have captured the images with your Autel drone and the Autel Explorer app, you will need to upload and process them with the DroneDeploy photogrammetry software. This is the software that will stitch your images together and create a high-resolution map or 3D model of your mapping area.
You can also use the software to analyze and visualize your data, such as measuring distances, areas, volumes, elevations, and more. To upload and process your images with the DroneDeploy photogrammetry software, you will need to follow these steps:
- Create a free account on the dronedeploy.com or log in if you already have one. You can also use your Google or Facebook account to sign up or log in.
- Click on the New Project button on the top right corner of the screen. This will open a dialog box where you can name your project and choose the type of map or model you want to create. You can choose from Orthomosaic, Elevation, 3D Model, or NDVI. You can also change the type later in the project settings.
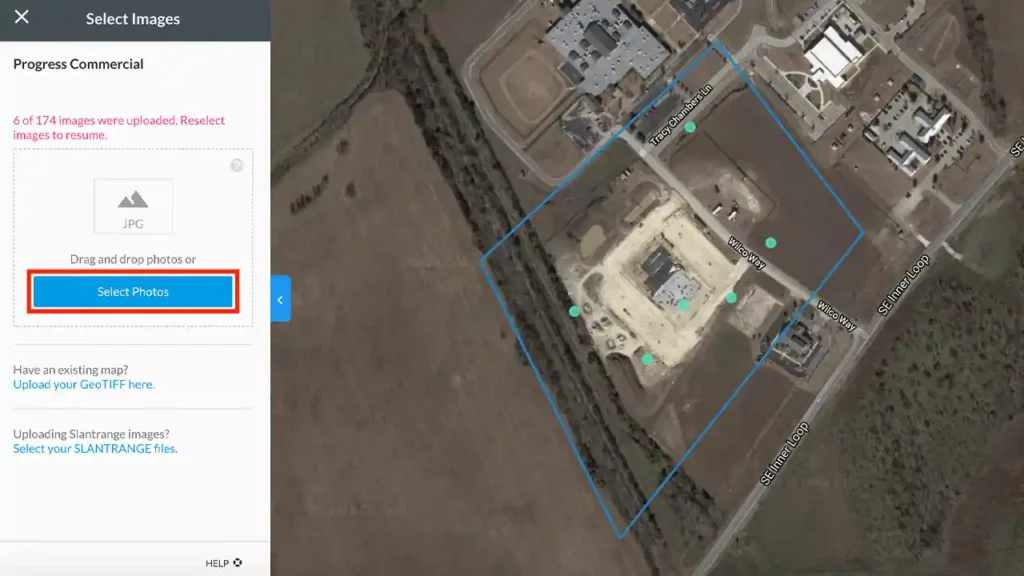
- Click on the Upload Images button on the top right corner of the screen. This will open a file browser where you can select the images you want to upload. You can also drag and drop the images from your computer to the upload area. You can upload up to 3,000 images per project, and each image should be less than 50 MB in size. You can also upload images in ZIP or RAR format, as long as they are not compressed or encrypted.
- Wait for the upload to complete. You will see a progress bar and a message indicating the status of your upload. You can also pause or cancel the upload at any time. You can also add more images to your project later, by clicking on the Add Images button on the top right corner of the screen.
- Wait for the processing to start. Once your images are uploaded, the DroneDeploy photogrammetry software will automatically start processing them. You will see a message indicating the status of your processing. You can also monitor the progress of your processing on the dashboard, where you can see the estimated time and cost of your project.
- Wait for the processing to finish. Depending on the number and quality of your images, the processing time may vary from a few minutes to a few hours. You will receive an email notification when your processing is done. You can also check the status of your processing on the dashboard, where you can see the percentage and the remaining time of your project.
- View and share your map or model. Once your processing is finished, you can view and share your map or model on the DroneDeploy web app. You can access your project from the dashboard, where you can see a thumbnail and a summary of your project. You can also click on the View Map or View Model button to open your project in the map or model viewer. You can also share your project with others, by clicking on the Share button on the top right corner of the screen. You can choose to share your project publicly or privately, and you can also generate a link or an embed code to share your project on other platforms.
These are the basic steps to upload and process your images with the DroneDeploy photogrammetry software. You can also use other features and settings of the software to customize your processing and analysis.
How to view and share your maps and data with the DroneDeploy web app
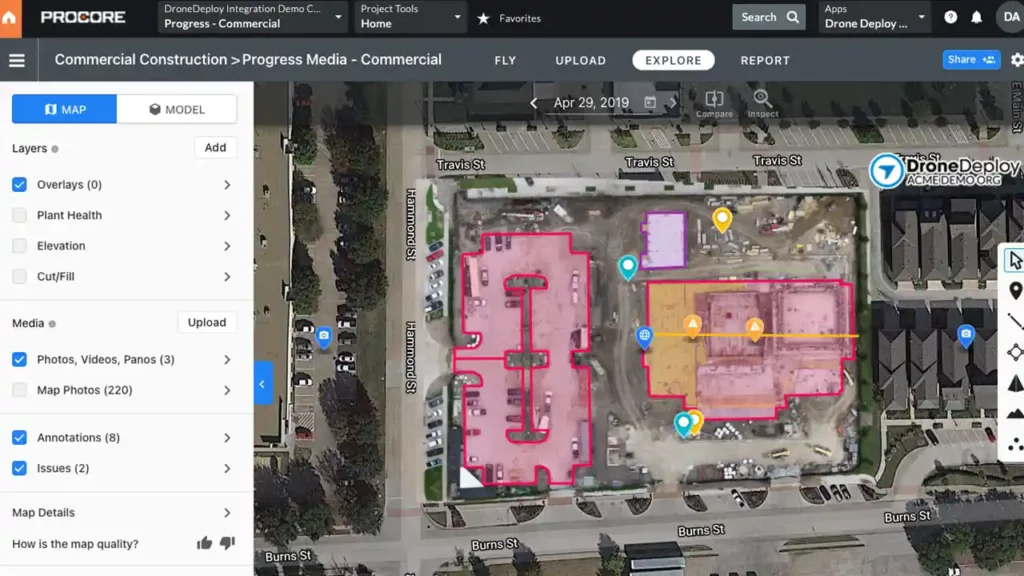
After you have uploaded and processed your images with the DroneDeploy photogrammetry software, you can view and share your maps and data with the DroneDeploy web app. The DroneDeploy web app is the online platform where you can access your projects from any device and browser.
You can also use the web app to analyze and visualize your data, such as measuring distances, areas, volumes, elevations, and more. To view and share your maps and data with the DroneDeploy web app, you will need to follow these steps:
- Log in to your account on the [DroneDeploy website] or sign up if you don’t have one. You can also use your Google or Facebook account to log in or sign up.
- Click on the Projects tab on the top left corner of the screen. This will open the projects page, where you can see all your projects and their details. You can also search, filter, sort, and delete your projects from this page.
- Click on the project you want to view or share. This will open the project page, where you can see the map or model of your project, as well as the summary, settings, and analysis tabs. You can also switch between the map and model view by clicking on the icons on the top right corner of the screen.
- To view your map or model, click on the Map or Model tab on the top left corner of the screen. This will open the map or model viewer, where you can zoom in or out, pan, rotate, and tilt your map or model. You can also use the tools on the left side of the screen to measure distances, areas, volumes, elevations, and more. You can also use the tools on the right side of the screen to change the base map, the map layer, the elevation mode, the 3D mode, and the NDVI mode. You can also use the tools on the bottom of the screen to play, pause, or rewind your flight path, and to change the speed, direction, and angle of your flight.
- To share your map or model, click on the Share tab on the top left corner of the screen. This will open the share menu, where you can choose from different options to share your project. You can choose to share your project publicly or privately, and you can also generate a link or an embed code to share your project on other platforms. You can also set the permissions and the expiration date for your shared project. You can also invite collaborators to your project, by entering their email addresses and assigning them roles. You can also manage your collaborators and their permissions from this menu.
These are the basic steps to view and share your maps and data with the DroneDeploy web app. You can also use other features and settings of the web app to customize your viewing and sharing experience.
Tips to optimize your mapping workflow with DroneDeploy
Now that you know how to use DroneDeploy with Autel drones, you may be wondering how to optimize your mapping workflow and get the best results possible. In this section, we will share some tips and tricks that can help you improve your mapping efficiency and accuracy with DroneDeploy and Autel drones.
- Plan your flight in advance: Before you go out to the field, you should plan your flight path and settings using the Autel Explorer app or a third-party app, such as [Litchi] or [Pix4Dcapture]. You should also check the weather, the battery level, the memory card capacity, and the airspace regulations of your mapping area. You should also scout the location and identify any potential obstacles or hazards that may interfere with your flight.
- Choose the optimal camera settings and interval mode: Depending on the type and purpose of your mapping project, you should choose the camera settings and the interval mode that suit your needs. You should adjust the exposure, ISO, shutter speed, white balance, and more to ensure that your images are clear and consistent. You should also enable the interval mode and set the time interval for capturing images automatically. You should choose a time interval that matches the speed and altitude of your flight, and that ensures sufficient overlap and coverage of your mapping area. You can use the DroneDeploy flight calculator to estimate the optimal time interval and other parameters for your flight.
- Fly in optimal conditions: To ensure the quality and accuracy of your images and data, you should fly in optimal conditions. You should avoid flying in strong winds, rain, fog, or low light. You should also avoid flying in areas with high electromagnetic interference, such as near power lines or radio towers. You should also avoid flying over moving objects, such as cars or people, as they may cause errors or gaps in your map or model.
- Check your images before uploading: After you have completed your flight and captured your images, you should check them before uploading them to DroneDeploy. You should make sure that your images are sharp, well-lit, and well-aligned. You should also make sure that your images have enough overlap and coverage of your mapping area. You should also delete any images that are blurry, dark, or irrelevant. You can use the Autel Explorer app or a third-party app, such as Airdata or ExifTool, to view and edit your images and their metadata.
- Upload and process your images with DroneDeploy: Once you have checked and edited your images, you can upload and process them with the DroneDeploy photogrammetry software. You should choose the type of map or model you want to create, and the processing options that suit your needs. You should also check the data processing requirements and guidelines before uploading your images to DroneDeploy. You should also monitor the progress and status of your processing on the dashboard, and wait for the email notification when your processing is done.
- View and share your maps and data with the DroneDeploy web app: After you have uploaded and processed your images with the DroneDeploy photogrammetry software, you can view and share your maps and data with the DroneDeploy web app. You should explore and analyze your data using the tools and features of the web app, such as measuring distances, areas, volumes, elevations, and more. You should also share your project with others, by generating a link or an embed code, or by inviting collaborators to your project. You should also export your data to various formats and integrations, such as PDF, CSV, GeoTIFF, KML, and more.
In conclusion, DroneDeploy is a great platform for mapping and data analysis, and you can use it with Autel drones with some extra steps. You can use the Autel Explorer app to fly your drone and capture images, and then upload them to the DroneDeploy web app for processing and analysis. You can also view and share your maps and data with the DroneDeploy web app. We have shown you how to use DroneDeploy with Autel drones. We hope that this has been helpfu for you.